Setting up a new cPanel server is just the beginning of creating a secure and efficient hosting environment. These cpanel configuration settings you apply right after installation determine your server’s security posture, performance characteristics, and long-term maintainability.
In this guide, you’ll go through the ten most critical settings to configure after your initial cPanel/WHM setup. As a result, your server is hardened against common attacks, optimized for performance, and ready for production workloads.
Why cpanel configuration settings Matter
Many security breaches and performance issues trace back to default configurations that were never properly hardened. Fresh cPanel installations include default settings designed for compatibility rather than security, leaving your server vulnerable to attacks.
Common Risks of Default Configurations
- Weak root passwords – Default or simple passwords invite brute force attacks
- Open SSH access – Standard port 22 faces constant automated attacks
- Missing firewall rules – Unrestricted access to all services
- No backup system – Data loss without recovery options
- Unoptimized services – Poor performance under load
- Missing monitoring – Undetected issues and attacks
Benefits of Proper Configuration
Spending 30-60 minutes on initial hardening provides:
- Dramatically reduced attack surface
- Better resource utilization and performance
- Automated backup and recovery capabilities
- Proactive monitoring and alerting
- Compliance with security best practices
- Foundation for scaling and growth
Setting 1: Change Root Password and Create Admin User
These cpanel configuration settings are designed to be applied immediately after installation.
The root password is your server’s master key. If your hosting provider set a default password or you used a weak password during installation, changing it immediately is critical.
Changing the Root Password
Connect to your server via SSH:
ssh root@your-server-ipChange the root password:
passwdFollow the prompts to enter your new password twice. Use a strong password with:
- Minimum 16 characters
- Mix of uppercase and lowercase letters
- Numbers and special symbols
- No dictionary words or personal information
Creating a Sudo User
Avoid using root for routine tasks. Create an administrative user with sudo privileges:
# Create new user
adduser adminuser

# Set strong password
passwd adminuser

# Add to wheel group (sudo access)
usermod -aG wheel adminuser
Test sudo access:
# Switch to new user
su - adminuser

# Test sudo
sudo whoami
The output should show “root”, confirming sudo access works.
Disabling Root Login via SSH
After creating your admin user, disable direct root SSH access:
# Edit SSH configuration
nano /etc/ssh/sshd_config

# Find and change this line:
PermitRootLogin no

# Save and restart SSH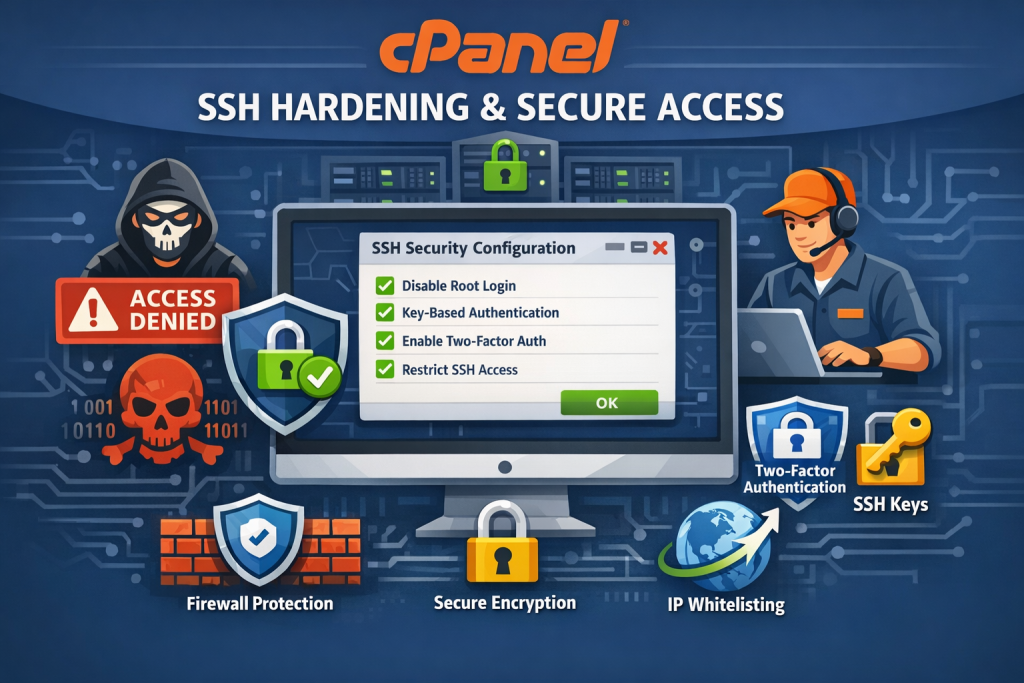
systemctl restart sshdSetting 2: Harden SSH Configuration
These cpanel configuration settings are designed to be applied immediately after installation.
SSH is often the primary target for automated attacks. Hardening SSH configuration dramatically reduces your attack surface.
Change SSH Port
Moving SSH from port 22 to a non-standard port eliminates 99% of automated attacks:
# Edit SSH config
nano /etc/ssh/sshd_config

# Find and change:
Port 2222  # Use any port between 1024-65535

# Save and restart
systemctl restart sshd
Update firewall to allow your new port:
# For CSF firewall
echo "TCP_IN = 2222,21,22,25,53,80,110,143,443,465,587,993,995,2077,2078,2082,2083,2086,2087,2095,2096,3306" > /etc/csf/csf.conf
csf -r
Disable Password Authentication
Use SSH keys instead of passwords for authentication:
Step 1: Generate SSH Key Pair (on your local machine)
ssh-keygen -t ed25519 -C "your-email@example.com"Step 2: Copy Public Key to Server
ssh-copy-id -p 2222 adminuser@your-server-ipStep 3: Disable Password Authentication
# Edit SSH config
nano /etc/ssh/sshd_config

# Change these settings:
PasswordAuthentication no
PubkeyAuthentication yes
ChallengeResponseAuthentication no

# Restart SSH
systemctl restart sshd
Additional SSH Security Settings
Add these to your sshd_config:
# Disable empty passwords
PermitEmptyPasswords no
# Limit authentication attempts
MaxAuthTries 3
# Set login grace time
LoginGraceTime 30
# Disable X11 forwarding
X11Forwarding no
# Enable strict mode
StrictModes yes
# Limit concurrent connections
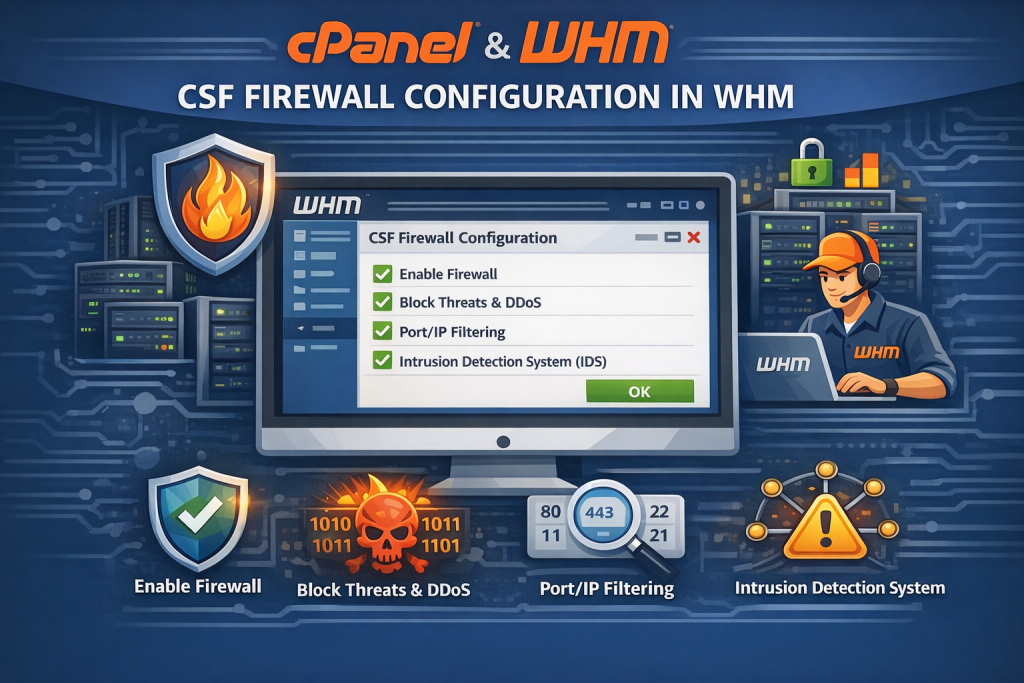
MaxStartups 3:50:10Setting 3: Configure and Enable Firewall (CSF)
These cpanel configuration settings are designed to be applied immediately after installation.
ConfigServer Security & Firewall (CSF) is the industry standard firewall for cPanel servers, providing robust protection and intrusion detection.
Installing CSF
cd /usr/src
rm -fv csf.tgz
wget https://download.configserver.com/csf.tgz
tar -xzf csf.tgz
cd csf
sh install.sh
Reference: For official CSF documentation and release notes, see ConfigServer CSF.
Basic CSF Configuration
Edit the main configuration file:
nano /etc/csf/csf.confEssential settings to configure:
# Disable testing mode
TESTING = "0"

# Enable Login Failure Daemon
LF_DAEMON = "1"

# Set SSH port if changed
TCP_IN = "2222,21,22,25,53,80,110,143,443,465,587,993,995,2077,2078,2082,2083,2086,2087,2095,2096,3306"
TCP_OUT = "1:65535"

# Enable SYN flood protection
SYNFLOOD = "1"
SYNFLOOD_RATE = "100/s"
SYNFLOOD_BURST = "150"

# Enable port scan tracking
PS_INTERVAL = "300"
PS_LIMIT = "10"

# Connection limit
CONNLIMIT = "80;50"

# Enable Port Knocking (optional)
PORTKNOCKING = "0"
Configure Login Failure Detection
CSF can automatically block IPs after failed login attempts:
# In /etc/csf/csf.conf, set:
LF_SSHD = "5"          # SSH failed logins
LF_CPANEL = "5"        # cPanel failed logins
LF_FTPD = "10"         # FTP failed logins
LF_SMTPAUTH = "5"      # SMTP auth failures
LF_POP3D = "10"        # POP3 failures
LF_IMAPD = "10"        # IMAP failures
LF_TRIGGER = "5"       # Trigger permanent block
LF_TRIGGER_PERM = "1"  # Make trigger blocks permanent
Allow Your IP Address
Allowlist your management IP to prevent self-lockout:
# Add your IP to allow list
echo "your.ip.address.here" >> /etc/csf/csf.allow

# Restart CSF
csf -r
Enable and Start CSF
# Enable CSF at boot
systemctl enable csf
systemctl enable lfd

# Start services
systemctl start csf
systemctl start lfd

# Test configuration
csf -tSetting 4: Configure Email Server and Anti-Spam
Properly configured email prevents your server from becoming an open relay and protects against spam abuse.
Disable Open Relay in Exim
Ensure your mail server doesn’t relay unauthorized mail:
# Check relay status
exim -bP relay_from_hosts

# Should show only localhost:
# relay_from_hosts = 127.0.0.1 : ::1
Configure SPF, DKIM, and DMARC in WHM
In WHM, navigate to these sections:
Enable SPF:
- Go to WHM → Email → Email Delivery
- Enable “Enable SPF”
- Set recommended settings
Enable DKIM:
- Go to WHM → Email → Email Authentication
- Click “Enable” for DKIM
- Configure for all domains
Configure DMARC:
Add DMARC records to your DNS zones:
_dmarc.yourdomain.com. 3600 IN TXT "v=DMARC1; p=quarantine; rua=mailto:postmaster@yourdomain.com"Enable SpamAssassin
Configure spam filtering in WHM:
- Navigate to WHM → Email → Apache SpamAssassin
- Enable SpamAssassin
- Set required score to 5.0
- Enable auto-learning
Limit Email Sending
Prevent abuse by limiting outbound email:
# WHM → Server Configuration → Tweak Settings
# Search for "Max hourly emails"
# Set to reasonable limit (e.g., 100-500 per hour per account)
Setting 5: Set Up Automated Backups
Backups are your insurance policy against data loss, ransomware, and accidental deletions.
Configure WHM Backup System
Navigate to WHM → Backup → Backup Configuration:
Schedule Settings:
- Backup Schedule – Daily at 2:00 AM (low-traffic hours)
- Backup Type – Compressed (saves disk space)
- Backup Retention – Keep 7 daily backups
- Backup Accounts – All accounts
What to Backup:
- ✅ MySQL Databases
- ✅ User Accounts
- ✅ System Files
- ✅ Email Configuration
- ✅ DNS Zones
Configure Remote Backup Destination
Never store backups only on the same server. Configure remote backup storage:
Option 1: FTP Backup
In WHM Backup Configuration:
- Add Additional Destination
- Select “FTP”
- Enter remote FTP server details
- Test connection
Option 2: Amazon S3 Backup
# Install S3 backup transport
/scripts/install_s3_backup_transport

# Configure in WHM → Backup Configuration
# Add S3 credentials and bucket name
Test Backup and Restore
After configuration, verify backups work:
# Run manual backup
/usr/local/cpanel/bin/backup --force

# Check backup status
tail -f /usr/local/cpanel/logs/cpbackup/*.log
Test restoration:
- Create a test cPanel account
- Back it up
- Delete the account
- Restore from backup
- Verify all files and databases restored correctly
Setting 6: Enable Automatic Updates
Keeping software updated closes security vulnerabilities and improves stability.
Configure cPanel/WHM Updates
In WHM → Server Configuration → Update Preferences:
Update Level:
- RELEASE – Stable releases (recommended for production)
- CURRENT – Latest features (use with caution)
- EDGE – Beta releases (not recommended for production)
Automatic Update Settings:
# Enable automatic daily checks
upcp_update_level="release"

# Automatic staging (test updates before applying)
auto_staging="1"
Configure Operating System Updates
For CentOS/AlmaLinux/Rocky Linux:
# Install yum-cron
yum install yum-cron -y

# Edit configuration
nano /etc/yum/yum-cron.conf

# Set automatic updates
apply_updates = yes
update_cmd = security

# Enable and start
systemctl enable yum-cron
systemctl start yum-cron
For Ubuntu/Debian:
# Install unattended-upgrades
apt install unattended-upgrades -y

# Enable automatic security updates
dpkg-reconfigure -plow unattended-upgrades

# Edit config
nano /etc/apt/apt.conf.d/50unattended-upgrades

# Enable automatic reboot if needed
Unattended-Upgrade::Automatic-Reboot "true";
Unattended-Upgrade::Automatic-Reboot-Time "03:00";
Monitor Update Status
Therefore, set up email notifications for updates:
# WHM → Server Configuration → Server Contacts
# Add administrator email for update notifications
Setting 7: Optimize PHP Configuration
PHP settings directly impact website performance and security.
Install Multiple PHP Versions
In WHM → Software → EasyApache 4:
- Currently Installed Packages
- Provision PHP versions: 7.4, 8.0, 8.1, 8.2, 8.3
- Enable required PHP extensions for each version
- Click “Provision”
Configure PHP Security Settings
Edit PHP configuration through WHM → Software → MultiPHP INI Editor:
Security Settings:
# Disable dangerous functions
disable_functions = exec,passthru,shell_exec,system,proc_open,popen,curl_exec,curl_multi_exec,parse_ini_file,show_source

# Hide PHP version
expose_php = Off

# Enable open_basedir restriction (per account)
open_basedir = /home/username/:/tmp/:/usr/share/pear/

# Disable remote file access
allow_url_fopen = Off
allow_url_include = Off

# Session security
session.cookie_httponly = On
session.cookie_secure = On
session.use_strict_mode = On
Performance Settings:
# Memory limits
memory_limit = 256M
post_max_size = 64M
upload_max_filesize = 64M

# Execution limits
max_execution_time = 300
max_input_time = 300

# OPcache settings
opcache.enable = 1
opcache.memory_consumption = 128
opcache.interned_strings_buffer = 8
opcache.max_accelerated_files = 10000
opcache.revalidate_freq = 60
opcache.fast_shutdown = 1
Enable OPcache
# Verify OPcache is loaded
php -m | grep opcache

# If not loaded, enable in WHM → MultiPHP Manager
# Select all PHP versions and enable Zend OPcache
Setting 8: Secure and Optimize MySQL/MariaDB
Database security and performance are critical for application functionality.
Run MySQL Secure Installation
mysql_secure_installationAnswer the prompts:
- Set root password: YES (if not already set)
- Remove anonymous users: YES
- Disallow root login remotely: YES
- Remove test database: YES
- Reload privilege tables: YES
Configure MySQL Performance
Edit MySQL configuration:
nano /etc/my.cnfAdd optimization settings under [mysqld]:
[mysqld]
# Memory settings (adjust based on available RAM)
innodb_buffer_pool_size = 1G
innodb_log_file_size = 256M
innodb_log_buffer_size = 8M

# Connection settings
max_connections = 200
max_connect_errors = 1000
connect_timeout = 10
wait_timeout = 600

# Query cache (if using MySQL 5.7 or earlier)
query_cache_type = 1
query_cache_size = 32M
query_cache_limit = 2M

# InnoDB settings
innodb_file_per_table = 1
innodb_flush_method = O_DIRECT
innodb_flush_log_at_trx_commit = 2

# Logging
slow_query_log = 1
slow_query_log_file = /var/log/mysql-slow.log
long_query_time = 2
Restart MySQL:
systemctl restart mysqlEnable MySQL Remote Access Restrictions
In WHM → SQL Services → Additional MySQL Access Hosts:
- Only add specific IP addresses that need remote access
- Never use 0.0.0.0 or % (allows all IPs)
Monitor Database Performance
# Check database status
mysqladmin -u root -p status

# View processlist
mysqladmin -u root -p processlist

# Check slow queries
mysqldumpslow /var/log/mysql-slow.log | head -20
Setting 9: Set Up Server Monitoring
Proactive monitoring detects issues before they become problems.
Configure Contact Information
In WHM → Server Contacts:
- Add administrator email and phone
- Enable notifications for:
- Service failures
- High server load
- Disk space warnings
- Security alerts
Enable Service Monitoring
In WHM → Service Configuration → Service Manager:
Enable monitoring for critical services:
- ✅ cpsrvd (cPanel daemon)
- ✅ httpd (Apache/LiteSpeed)
- ✅ mysql (Database server)
- ✅ exim (Mail server)
- ✅ named (DNS server)
- ✅ sshd (SSH server)
- ✅ cpanellogd (Log processor)
Configure Resource Monitoring
Set up disk space monitoring:
# WHM → Server Configuration → Tweak Settings
# Minimum free disk space percentage: 10%
# Email notification: yes
Install Additional Monitoring Tools
Install htop for resource monitoring:
yum install htop -y   # CentOS/RHEL/AlmaLinux/Rocky
apt install htop -y   # Ubuntu/Debian
Install iotop for disk I/O monitoring:
yum install iotop -y   # CentOS/RHEL/AlmaLinux/Rocky
apt install iotop -y   # Ubuntu/Debian
Set Up Log Monitoring
Configure log rotation and monitoring:
# Check log rotation
cat /etc/logrotate.conf

# Monitor important logs
tail -f /usr/local/cpanel/logs/error_log
tail -f /var/log/messages
tail -f /var/log/secure
Setting 10: Additional Security Hardening
Complete your security configuration with these essential hardening steps.
Enable ModSecurity (Web Application Firewall)
In WHM → Security Center → ModSecurity:
- Enable ModSecurity
- Install OWASP rule set
- Set to “On” (not “Detection Only”)
- Configure for all domains
Reference: OWASP Core Rule Set details are available at OWASP CRS.
Install and Configure ClamAV
# Install ClamAV
yum install clamav clamav-update -y   # RHEL-based
apt install clamav clamav-daemon -y   # Debian-based

# Update virus definitions
freshclam

# Enable in cPanel
# WHM → Security Center → ClamAV Scanner
# Enable scanning on upload
Configure File System Permissions
# Run permissions script
/scripts/check_cpanel_rpms --fix
/scripts/upcp --force

# Set secure permissions for home directories
chmod 711 /home/*

# Secure tmp directories
chmod 1777 /tmp
chmod 1777 /var/tmp
Enable Two-Factor Authentication
In WHM → Security Center → Two-Factor Authentication:
- Enable 2FA for WHM
- Enable 2FA for cPanel users
- Require 2FA for all admin accounts
Configure Security Policy
In WHM → Security Center → Security Policy:
Password Strength Settings:
- Minimum password strength: 70
- Minimum password length: 12 characters
- Require special characters: Yes
- Password dictionary check: Yes
Enable cPHulk Brute Force Protection
In WHM → Security Center → cPHulk Brute Force Protection:
# Enable cPHulk
# Configure:
- Brute force protection period: 300 seconds
- Maximum failures per period: 5
- IP-based brute force protection: enabled
- Username-based protection: enabled
Reference: For cPHulk basics and tuning guidance, see cPanel Documentation.
Disable Unnecessary Services
# List running services
systemctl list-units --type=service --state=running

# Disable unnecessary services
systemctl disable postfix    # If using Exim
systemctl disable cups       # Print services
systemctl disable bluetooth  # Bluetooth on servers
Verification Checklist for cpanel configuration settings
After completing all ten configuration steps, verify your server is properly secured and optimized.
Security Verification
| Check Item | Verification Command | Expected Result |
|---|---|---|
| Root password changed | Try logging in | New password works |
| SSH hardened | grep Port /etc/ssh/sshd_config | Non-standard port |
| Firewall active | csf -v | CSF running |
| Email configured | exim -bP relay_from_hosts | Only localhost |
| Backups working | ls /backup | Recent backups exist |
| Updates enabled | Check WHM Update Preferences | Automatic updates on |
| PHP optimized | php -i | grep opcache | OPcache enabled |
| MySQL secured | mysql -u root -p -e "SELECT user FROM mysql.user;" | No anonymous users |
| Monitoring active | Check WHM → Service Status | All services monitored |
| ModSecurity enabled | Check WHM → ModSecurity | Status: On |
Performance Verification
Run these tests to verify performance optimizations:
# Check server load
uptime

# Memory usage
free -h

# Disk usage
df -h

# Active connections
netstat -an | grep ESTABLISHED | wc -l

# MySQL performance
mysqladmin -u root -p status

# PHP OPcache status
php -i | grep opcache
Post-Configuration Tasks
After completing the initial ten settings, consider these additional tasks to further optimize your server.
Related guides: See our SSH hardening guide and backup strategy checklist for a deeper dive.
Documentation
Document your configuration for future reference:
- SSH port number and authentication method
- Firewall rules and allowlisted IPs
- Backup schedule and remote destinations
- PHP versions installed and default settings
- MySQL optimization parameters
- Monitoring alert recipients
- Security policies and password requirements
Create Recovery Plan
Prepare for potential issues:
- Document console access through hosting provider
- Store backup credentials securely
- Test restore procedures
- Create disaster recovery checklist
- Document rollback procedures
Schedule Regular Maintenance
Set reminders for recurring tasks:
- Daily: Check backup logs, review security alerts
- Weekly: Review server load, disk usage, slow query logs
- Monthly: Test backup restoration, review user accounts, update documentation
- Quarterly: Security audit, performance optimization review
Common Configuration Mistakes to Avoid
1. Not Testing Before Enabling
Always test configurations before applying them to production:
- Test SSH key authentication before disabling passwords
- Verify firewall rules before enabling CSF
- Test backup restoration before assuming backups work
2. Overly Restrictive Security
Balance security with usability:
- Don’t set PHP memory_limit too low (breaks applications)
- Don’t block legitimate traffic with aggressive firewall rules
- Don’t disable functions that applications require
3. Ignoring Logs
Logs provide valuable troubleshooting information:
- Check error logs after configuration changes
- Monitor authentication logs for brute force attempts
- Review backup logs to ensure success
4. Not Updating Contact Information
Ensure notifications reach the right people:
- Keep server contact emails current
- Test notification delivery
- Add multiple contacts for redundancy
5. Skipping Backups to Save Disk Space
Backups are non-negotiable:
- Use compression to save space
- Store backups remotely
- Adjust retention policies if space is limited
- Never disable backups to save disk space
Advanced Configuration Tips
Automated Configuration Management
For managing multiple servers, consider automation:
# Create configuration backup script
cat > /root/backup-configs.sh << 'EOF'
#!/bin/bash
BACKUP_DIR="/root/config-backups/$(date +%Y%m%d)"
mkdir -p $BACKUP_DIR

# Backup important configs
cp /etc/ssh/sshd_config $BACKUP_DIR/
cp /etc/csf/csf.conf $BACKUP_DIR/
cp /etc/my.cnf $BACKUP_DIR/
cp /usr/local/lib/php.ini $BACKUP_DIR/

echo "Configuration backup completed: $BACKUP_DIR"
EOF

chmod +x /root/backup-configs.sh
Security Scanning
Regularly scan for vulnerabilities:
# Install rkhunter (rootkit scanner)
yum install rkhunter -y

# Update and scan
rkhunter --update
rkhunter --check

# Install ClamAV and scan
freshclam
clamscan -r /home --infected --log=/var/log/clamav-scan.log
Performance Tuning
Monitor and optimize based on actual usage:
# Generate MySQL tuning recommendations
wget https://raw.githubusercontent.com/major/MySQLTuner-perl/master/mysqltuner.pl
perl mysqltuner.pl

# Check Apache/LiteSpeed performance
ab -n 1000 -c 10 http://yourdomain.com/

# Monitor PHP-FPM
watch -n 1 'ps aux | grep php-fpm | wc -l'
Troubleshooting Common Issues
Locked Out After SSH Configuration
If you locked yourself out after SSH changes:
- Access server through hosting provider’s console/VNC
- Edit /etc/ssh/sshd_config to restore access
- Restart SSH:
systemctl restart sshd - Always test SSH in separate session before closing original connection
Firewall Blocking Legitimate Traffic
If CSF blocks needed services:
# Temporarily disable CSF
csf -x

# Add allowed port
echo "TCP_IN = 2222,21,22,25,53,80,NEW_PORT,..." > /etc/csf/csf.conf

# Restart CSF
csf -r
Email Not Sending
If email stops working after configuration:
# Check Exim status
systemctl status exim

# View mail queue
exim -bp

# Test email sending
echo "Test email" | mail -s "Test Subject" your-email@example.com

# Check Exim logs
tail -f /var/log/exim_mainlog
High Server Load After Optimization
If server load increases after changes:
- Check which process is causing high load:
top - Review recent configuration changes
- Check MySQL slow query log
- Verify PHP processes aren’t stuck
- Review Apache/LiteSpeed error logs
Best Practices Summary
- Test in Non-Production First – If possible, test configurations on a staging server
- Change One Thing at a Time – Makes troubleshooting easier if issues arise
- Document Everything – Keep detailed notes of all configuration changes
- Monitor After Changes – Watch server metrics for 24-48 hours after major changes
- Keep Backups Current – Verify backups before and after configuration
- Use Strong Passwords – Never compromise on password strength
- Enable All Security Features – Don’t disable security for convenience
- Regular Security Audits – Review security settings quarterly
- Stay Updated – Keep all software current with security patches
- Plan for Recovery – Have documented procedures for disaster recovery
Conclusion
Properly configuring your cPanel server immediately after installation establishes a strong foundation for secure, reliable hosting operations. These ten essential settings address the most critical aspects of server management: security hardening, performance optimization, data protection, and proactive monitoring.
Taking the time to complete these configurations before hosting production websites significantly reduces your risk of security breaches, data loss, and performance issues. While default cPanel installations are functional, they prioritize compatibility over security, leaving your server vulnerable to common attacks and operational problems.
The steps outlined in this guide represent industry best practices developed through years of hosting experience and security research. By implementing strong authentication, comprehensive firewall protection, automated backups, regular updates, and proactive monitoring, you create a server environment that can withstand common threats while delivering optimal performance.
In addition, remember that security and optimization are ongoing processes, not one-time tasks. Schedule regular reviews of your configurations, stay informed about emerging threats, and continuously monitor your server’s performance and security posture.
With these ten settings properly configured, your cPanel server is ready to host production websites with confidence, knowing you’ve implemented the essential protections and optimizations that separate professional hosting environments from vulnerable systems running on default configurations.